Posts tagged 'Coding'

Unmatched Style’s CSS Off Was Slimey Fun

UnmatchedStyle.com hosted a CSS competition for front-end devs to strut their stuff among their peers. Everyone got the same design and it was up the entrant to come up with the most efficient, pixel-perfect, bleeding-edge, fully functioning interpretation. The deceptively simple looking design was lovingly crafted by the rowdy folks of Paravel and sent out two weeks ago. Entries were due at 5pm today. Here’s the low down on my submission.

First, you should probably play around with my finished design and compare it with the static mockup (linked above). Go check it out… I’ll wait. Did you drag the corner of the browser to check how it responds to different browser sizes? Of course you did you CSS nerd.

  •  Somehow I messed up the colors of the design. My layout has really bright colors while the original design uses more muted colors. I have no idea how this happened.
  • The logo is a background image attached to the element of the section. I was inspired by html5forwebdesigners.com.
  • I forgot to add the blue faded slime splat in the header. I kind of screwed myself by using the <head> and <header> elements in the same section though I could have attached it to the <HTML> element. Oh well.
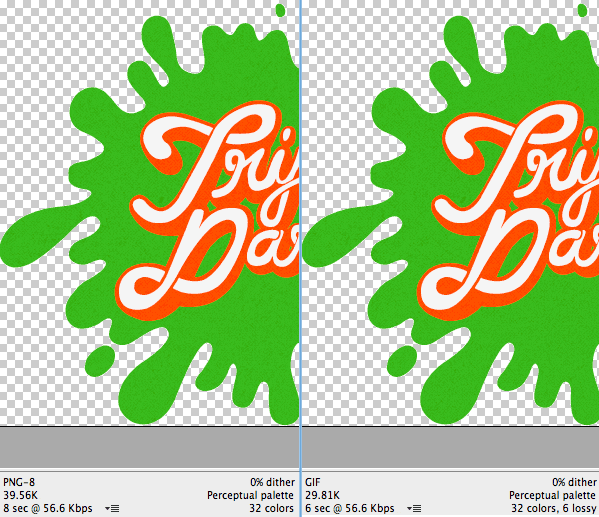
  • Instead of PNGs I used GIFs in some places due to the smaller file size (thanks to increasing the Lossy section in Photoshop’s Save For Web dialog)
  • Navigation links are at the bottom of the page with position:fixed (sticks to the top of the viewport) set for larger screens and an anchor link to the bottom of the page for smaller screens.
  • The obstacles section is built with two sprites using the same background-position offsets. I wanted to just use one sprite for the larger images and use background-size to scale them down for the thumbnails. Performance took a big hit so I simplified.
  • The larger obstacle images are within a
    element with overflow:hidden applied. The thumbnails link to the IDs of the larger version so no JavaScript is required to show/hide them.
  • The labels for the prizes that appear on hover are pulled from the title attribute of the link dynamically using CSS.
  • The form uses required and pattern attributes for validation without any JavaScript. If I had more time I would add a validation script as a fallback.
  • When the countdown reaches zero I “slime” the user using a number of slime splat images already loaded in the design.
  • The two addresses to the studios are marked up with a vCard microformat so machines can easily parse that information.
  • I did not use the <address> element for the studio addresses because that is not what it is for.
  • The custom <select> drop down styles are images with the invisible <select>’s laid overtop. They’re not useable for sighted keyboard users. This is probably my least favorite part of my design.
  • I focused much of my time on making the design accessible and didn’t even bother checking what it looks like in browsers outside of Firefox 7, Chrome 15, and Safari 5 (all Mac versions). I just didn’t have enough time.
  • This layout is sluggish on my Nexus One most likely due to the way I added the semi-transparent grainy texture.
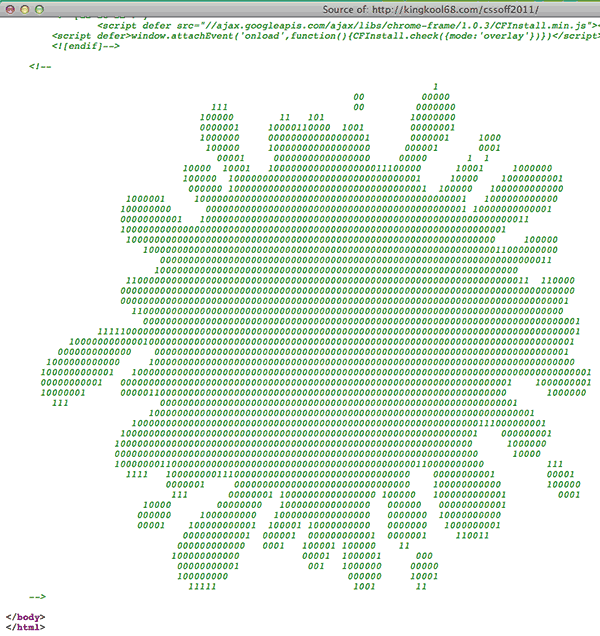
  • I added some ASCII art as an HTML comment at the bottom of the page. I like adding little easter eggs like that.
  • Finding the right element to make a favicon image from was tricky. I settled on the KN from the Knucklelodeon logo because it looked the best at 16×16.
  • You can pin the site to your desktop if you’re using IE9 and Windows 7 since I added a fewelements. Of course I forgot to add the more basic description, keyword and other general elements.
  • Selecting text uses the same colors as the hove styles, yellow background with reddish-orange text and no text shadow.
  • My custom JavaScript code is in a single block at the bottom of the page and not in a separate file. Since it is a single-page site, there is no benefit to externally linking it.

This was also my first responsive design. I started out making the large 1024px version first and then going back to make smaller versions. Big mistake. It’s a lot easier to start with mobile first and then build your design up, larger and larger. Media queries are also a pain in the butt since it requires a ton of going back and forth from the top of the stylesheet to the bottom where the media query styles were. When I changed styles for one target size, I had to double-check that those changes didn’t (or did) cascade into the larger sizes. This also resulted in a lot of duplicate selectors. What would be ideal is to set-up different classes on the HTML element with a class for different resolutions. This would be similar to how we handle conditional styles for Internet Explorer. This way we could group similar styles in the same area which makes it easier to keep track of changes.

Sites I Referenced

Other Noteworthy Entries

So what do people do once the contest comes to an end? Share their work on Twitter for others to comment on of course!  Here are some of the other entries I found searching Twitter for #cssoff.

Finally if you want to show off your entry, @daljo628 is hosting them at http://knucklelodeon.com/ Ping him to have yours added.

Phew! I’m glad I’m not in the judge’s shoes now. Having to go through all the entries and ultimately pick a winner; That’s a tough call.

Update: The top 25 entries have been announced!

Dummyimage.com Can Calculate Ratios Now

Thanks to Duncan Stephen’s blog post about dummy images, I was inspired to add a new feature.

All of the customisation options have got us excited, but I can think of a few more features that would improve it even further.

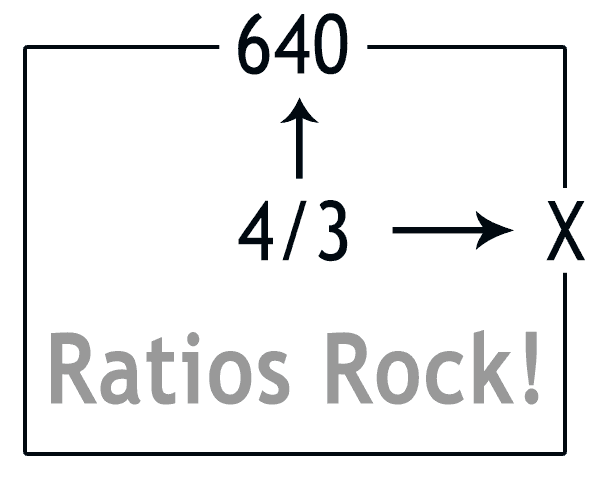
The ability to set a width and an aspect ratio, for those times when you know you need a 16:9 image but just can’t be bothered to get the calculator out.

What a great idea! It took me an hour or two to thoroughly test the new feature to my satisfaction and push it live. I’ve also updated the documentation and source code for anyone who wants to take a look to see how it’s done.

You can use aspect ratios with the width like so:

http://dummyimage.com/640×4:3

or with the height

http://dummyimage.com/16:9×1080

I enjoy adding new features that make a designer/developers life a bit easier. If you have something that you would like to see dummyimage.com do, let me know!

The History Of Dummyimage.com

As 2010 is wrapping up, I decided to take some time to chronicle the history of one of my biggest web development milestones of the year.

In December of 2006, I started my first real job out of college as a frontend developer at USNews.com. My first big project was to turn a new site design from a collection of Photoshop documents into functioning HTML and CSS code. I had to slice up dummy images to put into the layouts. As the redesign process wore on, sizes of elements changed ever so slightly meaning I needed to make new images with each iteration. I had wished there was a way to conjure up these placeholder images on the fly. I ended up tucking that idea away in the back of mind.

For whatever reason I decided to purchase the domain dummyimage.com on the 20th of July, 2007. I can’t remember if I had some early prototype version working by then but I had made up my mind that I was going to do something with this idea. Like most tinkering web devs, I have a stable of domains for other ideas sitting around until one day when I can get around to them. Dummyimage.com was not like those other ideas.

Fast forward to August 11th, 2007, when I attended my first Bar Camp in Washington DC. I had mentioned my dummy image idea to Jason Garber and Jeremy Carbaugh in passing. They said it was a cool idea and should be pretty easy to do.

From then on, I was determined to figure out how to make my idea work. Aside from toying around in WordPress (which resulted in this blog you’re reading now) I had zero experience with PHP. I was quite comfortable with JavaScript however and found PHP easy to pickup. On August 26th, 2007, I had launched my first version of dummyimage.com.

The first release was as simple as could be. The only thing you could change were the dimensions of the images. Everything was a gray background with the size of the image in centered black Arial text. I released the source code via a no-frills zip archive for anyone to take it and do what they wanted. I didn’t even bother with a design for the site itself thinking only a handful of people would even see it.

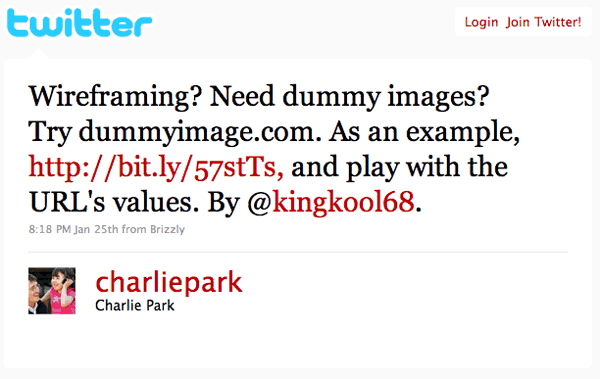
Around December of 2009 I began toying with some new capabilities for dummyimage.com. The biggest request I got was for the ability to change the colors of the background and text. I didn’t really see the point so I sat around on the new changes. Then on January 25th, 2010. My friend Charlie Park (whom I met at the first DC Bar Camp in 2007) tweeted out a link mentioning dummyimage.com My site made its way through the developer community like wildfire thanks to HackerNews, and Twitter. Suddenly I felt the need to get working on new features and a redesign for dummyimage.com based on the feedback that was pouring in.

On March 10th, 2010, (Chuck Norris’ Birthday & International Day of Awesomeness) I launched version 2 of dummyimage.com.This added color options, the ability to customize the text displayed on the image, and a simple form on the homepage to make generating custom dummy images easier. I switched the typeface from Arial to a completely free and open font called M+. I also released the source code under the liberal MIT license based on feedback I had gotten.

I wanted the new dummyimage.com look to be a little rebellious. Most sites are centered align in relation to the browser. I deliberately made the dummyimage.com homepage align to the right. You can really notice this the larger your monitor’s resolution is. One person even sent me an e-mail providing a CSS tweak to make it center align. He thought I had made a mistake.

Since other people were doing other things with the dummyimage idea like making plugins for text editors and different platforms, I decided to curate those and link to them from dummyimage.com I was happy to see my idea taking hold with the community, even spreading to non-english areas of the web. I guess the simplicity of my little project transcends language barriers.

Dummyimage.com gets about 10,000 unique visits to it’s one and only page. It’s single largest day of traffic was January 26th, 2010, with 15,766 unique visits. Of course most of the traffic comes from people embedding images into their pages. I get about 5.8 million requests (pageviews essentially) for a total of 11.4 gigabytes of bandwidth in a typical month. I have gigs and gigs of server logs to analyze if I really wanted specifics but I leave dummyimage.com’s server stats open for anyone to take a look at.

With the redesign I aimed to make a little extra change by placing 3 ad units to the left. They probably bring in a couple dollars a month via Amazon.com referrals. I don’t really pay attention to that stuff.

So all in all I’m happy with where dummyimage.com has come and it makes for a great milestone in 2010. Hopefully in 2011 I can manage to launch even bigger projects I have in mind.

The Trials And Tribulations Of 10KB

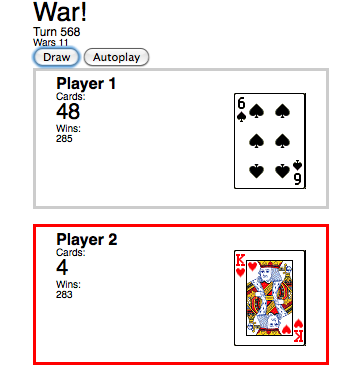
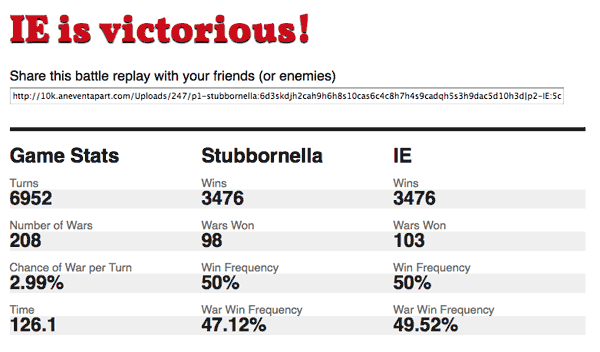
JavaScript is a fun language. It lets you build almost anything you can imagine. For some reason, I thought it would be fun to build a simulator for the card game War. I started hacking away on the idea in my spare time. It was also a good excuse to learn object-oriented JavaScript to make my card game simulator flexible and modular. After a few weekends I had something that worked (screenshot below). Unfortunately after that life got busy and my war simulator just sat there collecting virtual dust for more than a year.

Fast forward to July 29th when the 10K Apart contest is launched challenging developers to build compelling apps that are 10 kilobytes or less. This would be a fun way to refine my stale war game simulator as well as test my JavaScript coding-foo to squeeze it all in to 10 kilobytes.

Pure HTML Cards

One of my first challenges was re-doing the cards. Initially I constructed a single-image sprite containing all of the cards. JavaScript would manipulate the class of a div which would determine how to position the image for the proper card to be displayed. This method led me to discover something Internet Explorer actually gets right with CSS and the other browsers fall short. This image of all of the cards weighed in at 36KB alone. Ouch!

My solution was to use unicode characters for the different suites and letters and numbers for the card values. Child elements of the card held the symbols and I positioned them absolutely within the card element. The final touch was to rotate one of the child elements 180 degrees using the transform CSS property so it would display upside down just like a real card. My image-less approach was just a fraction of the size of using images for cards. But something was still missing.

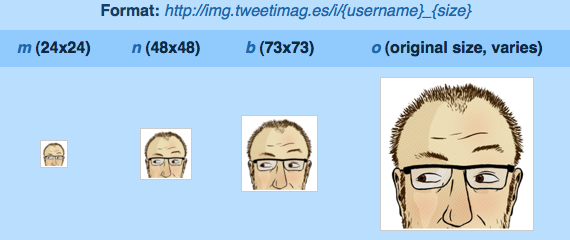
Playing cards have decorative designs in the middle. It would be too complicated to completely replicate these designs so I came up with the idea to use a Twitter avatar as a background. Thanks to the awesome service provided by http://tweetimag.es/ their RESTful api let me grab any public Twitter users avatar by constructing a simple URL. Browsers provide an easy way to  add new CSS rules to a stylesheet via JavaScript so I could dynamically change the background image of a card based on which Twitter names the user provided. This is where the idea for making my War game simulator revolve around Twitter users was born.

Viral Sharing

A bigger advantage to hooking into Twitter is it makes each game more personal for the player. Pitting two people in a card game battle makes the experience more meaningful then a bunch of plain, virtual playing cards flipping back and forth for a couple hundred of turns. This also has the potential for a viral aspect to my app since I already have atleast two Twitter names that would be interested in the results. In order to share a game I needed to create a way to read in the number of players, their twitter name, and their deck at the start of the game. Using a simple string of characters that represented this data attached to the end of the URL allowed me to do this. All of the values in the deck could be stored as a number or letter since I had unique first letters.

Card Encoded Equivalent
0, 1, 2 … 10 0, 1, 2 … 10
Jack j
Queen q
King k
Ace a
Hearts h
Diamonds d
Spades s
Clubs c

Therefore, the Ace of Spades could be represented as ‘as’, the 10 of Diamonds would be ’10d’ and so on. A full game looks like this: p1-kingkool68:adqhkc2d5d10s3h3d5hjs8dqc9c8h2s9d6c7c9skd10d8c7s7d2c4s|p2-naudebynature:jc6d10cjdkh5c4h6sqdks2has6h4d7h4cac10h9hah3s8s5s3cjhqs

A Heap of Data

One of my favorite parts of developing this app was creating a way for keeping track of all the different data that results from a single game. For each war I store the turn it occurred on as well as keep track of which player won the war. After each turn I store a copy of the players deck for further analysis after the game concludes. I originally wanted to include a line graph showing the number of cards a player had in their deck as the game progressed. Building that feature was pretty simple thanks to the Google Charts API but in the end it had to be cut in order to get below the 10KB limit.

Squeezing Down the Bits

I was a little ambitious with the functionality that when I was ready to start compressing my code down I was shocked to see my idea bloated to 33KB. That’s more than 3 times the maximum size. A serious slimming down was in order. Pre-populat lists of Twitter users that would make for interesting battles: cut. Charting capabilities mentioned earlier: gone. A brief blurb explaining the game and who I was: removed. Title tags: discarded. Every little bit I could trim down would help. After all this I was down to about 17KB and along way to go to get under 10KB.

Dean Edwards took JavaScript compression to another level with his /packer/ tool. He came up with away to reduce the size of JavaScript by removing white space, stripping comments, and replacing variables with shorter, less-coherent replacements. CleanCSS.com does pretty much the same thing but for CSS. Such optimizations include replacing font-weight:bold; with font-weight:700; color:#ff0000; with color:red; and so forth. These packing tricks helped get me to 13KB but I was running out of ways to optimize further.

My next plan was to modify my HTML. IDs like ‘prepare-for-war’ became a single letter, <strong> elements were replaced with deprecated <b> tags, and the closing </body> and </html> tags were axed since they had no affect on my page. Sidenote: Google chops off the closing </body> and </html> tags which for a site that serves up that volume of pages results in a savings of a couple million dollars in bandwidth bills every year.</end sidenote>

At this point I was so close to coming under 10KB but yet so far. It was time for one more drastic technique. I noticed how well the JavaScript /packer/ tool worked so I decided to combine my HTML and CSS into a single line and use JavaScript to write it out to the page as it was loading. This way I could combine it with my main JavaScript code for the most efficient compression possible. After 3 hours of toiling in vain, I reached the point where my app was under the magic limit. Ten kilobytes is equal to 10,240 bytes. My code weighed in at 10,236 bytes; a mere 4 bytes to spare!

Lessons Learned

Even after spending hours tediously compressing and optimizing my code, I still had a lot of fun. My biggest challenge wasn’t squeezing everything down, or getting it all to work just right. Rather my biggest challenge was myself and when to determine it was finished. After each piece of functionality I coded I wound up thinking of two more things to make it even better. Once it was submitted to the contest gallery, my app got some luke-warm attention but I’m used to that now. Personal projects I toil over never get the amount of attention I always think they will. I’m anxious to see who wins the 10K Apart contest and whether my War app gets any mention at all from the judges.

But in the end that doesn’t matter. What matters is I got my idea out of my head and into a working state where people could actually try it out, no matter how trivial of an idea it is. And that is what makes the web such a great platform for an individual like myself.

5 Links Of Interestingness

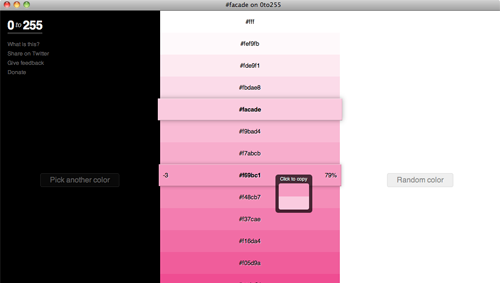
http://0to255.com/ – “0to255 cures your color manipulation woes. Simply pick the color that you want to start with and 0to255 gives you a range of colors from black to white using an interval optimized for web design. Then, just click the variation you want to use and the hex code is automatically copied to your clipboard.” My favorite part is that it uses a RESTful API so you can do things like http://0to255.com/0099ff You know I just love things that you can manipulate with a url.

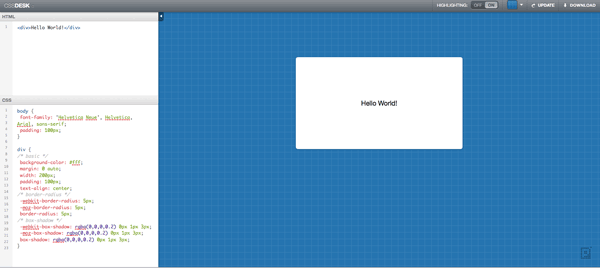
http://cssdesk.com/ – A tool for quickly mocking up snippets of HTML/CSS. I would prefer to just create a new HTML file in Dreamweaver and play with it using Firebug, but this could work too. I found the cursor in the HTML/CSS box to be a little off when hitting return. CSSdesk has a nice interface which is almost like a desktop application. And since you can download it and run it locally, I guess it qualifies as a genuine application.


Please Do Not Change Your Password – Alot of security’s best practices cause more problems than they solve. “At countless conferences and seminars, experts have consistently called for more education and outreach as the answer to user apathy or ignorance. But the research of Herley and others is causing many to realize most of the blame for noncompliance rests not with users, but with the experts themselves — the pros aren’t able to make a strong case for all their recommendations.”

Holistic Web Browsing: Trends Of The Future – “The future of the Web is not at your desk. It’s not necessarily in your pocket, either. It’s everywhere.” How do we design for a Web that was only intended to be used in a single context?

WTF? (Video) – “This clip comes from Hard Ticket to Hawaii, possibly the worst 1980’s movie made (though to be fair, it’s tagline of Bombs, Babes, and Beaches is quite… radical).” At first I thought the acting was WTF, then I saw the ending.

“How many SEO copywriters does it take to change a lightbulb, light bulb, light, bulb, lamp, bulbs, flowers, flour…?” — Chris Rowe

Making JavaScript And The Blip.tv Player Work

It sure would be nice if the blip.tv player had an easy way to change which video is playing in a playlist using their JavaScript API. But they don’t, so I had to roll my own to make the two play together nicely. Here is the end result (Note there are some line breaks I put in here for visual formatting, it might not work):

var player;
var currentPlaylistItem;
var currentState;
function getUpdate(type, arg1, arg2) {
	switch(type) {
        case "state":
			currentState = arg1;
		break;
		case "item":
			currentPlaylistItem = arg1;
			var episode = player.getCurrentItem();
			document.title = episode.title;
        break;
    }
}

var flashvars = {
	'file': 'http://blip.tv/play/ha0CjMVEh_8o',
    'enablejs': 'true',
    'javascriptid': 'blip_player',
    'autostart': 'false'
};

var params = {
	'allowscriptaccess': 'always',
	'allowfullscreen': 'true',
	'expressinstall': '/millennials/flash/expressInstall.swf'
};

var attributes = {
	'id': 'blip_player',
	'name': 'blip_player'
};
swfobject.embedSWF('http://blip.tv/play/ha0CjMVEh_8o',
'blip_player', '770', '470', '8.0', false, flashvars,
params, attributes, swfCallBack);

function swfCallBack() {
	player = document.getElementById('blip_player');
	$('#agenda h3 a, #agenda a.blip_tv').click(function(){
		var playlistItemNum =
                    $(this).attr('href').split('#')[1];
		changePlaylist(Number(playlistItemNum));
		$.scrollTo('.video .player', 800);
		return false;
	});
}

function changePlaylist(num) {
		var direction = 'prev';
		var diff = currentPlaylistItem - num;
		if (diff < 0) {
			direction = 'next';
			diff = Math.abs(diff);
		}
		for(i=0; i < diff; i++) {
			player.sendEvent(direction);
		}
		if (currentState == 0) {
			player.sendEvent('play');
		}
}

There are three requirements to getting started as outlined in the blip.tv wiki:

  1. The player must be embeded with the enablejs=true Flash variable set
  2. The player must be embeded with allowScriptAccess=always object/embed parameter set
  3. A JavaScript function must exist named getUpdate()

The first part of my script sets up three global variables that we’ll use.

  • player will reference the object/embed element by an ID. It is how we send commands to the show player.
  • currentPlaylistItem is the number of the video selected (or position) in the playlist.
  • currentState is either 2 (playing), 1 (loading), or 0 (stopped) depending on the current state of the player.

The getUpdate() function listens to the blip.tv player for changes like when the player is stopped or a video is changed in the playlist. The type argument is a string which we can send through a switch statement to determine what we need to do.

If the state of player has changed then we update our currentState variable with the value of arg1 (which will be a number between 0 and 2). If the event is an item change, we will update the currentPlaylistItem variable to reflect that. As an added bonus we get the title of the current playing video and change the title of the webpage to reflect this. This has zero SEO value and is really only a convenience to our audience.  Now that we know what is going on, lets get to the fun stuff.

Three variables (which are really Objects) are created for swfobject so we can easily embed the video player dynamically into the page. The ‘blip_player’ paramter is the ID of the player that we’ll be referencing shortly. The swfCallBack() function is called once the blip.tv player has loaded. There we set our player variable to reference the element of the blip.tv player. I used a line of jQuery to set the onClick() events of a group of links that will change the playlist when they are clicked.

In the HTML the links contain direct links to each blip.tv video and an anchor with a number after it. This number is the playlist position of the specific video. jQuery makes it a snap to extract just that number from the URL which we store in the playlistItemNum variable. The playlistItemNum variable is passed along to a function called changePlaylist() which does all of the heavy lifting.

Since the blip.tv show player doesn’t have a direct way of going to a specific video in a playlist, we have to hit the next or previous button on the player programmatically. The direction is set to ‘prev’ initially.  diff is calculated by subtracting the number passed to the function from the position of the currently playing video, currentPlaylistItem.

If diff is a negative number than we need to switch the direction variable to ‘next’ and get rid of the negative number by calling the absolute value method ( Math.abs() ). Now we simply send the player a command to go to the next or previous video as many times as we need to get to the desired video via a loop. Finally, if the player is stopped, we send the video player a command to start playing the video.

As an added nicety, we gently scroll the viewer up the page to the top of the video player so they’re not left wondering why nothing happened. The jQuery scrollTo plugin makes this a breeze to do.

There is one caveat for the changePlaylist() function to work: the playlist needs to be visible on the blip.tv show player. This is simply an option you set on the player configuration screen on blip.tv. Without it showing, we can’t get which video is playing and the whole thing falls apart.

That wraps up how to roll your own playlist changing function as well as shed some light on how you might control other things about the blip.tv show player using JavaScript. You can see this in action on the Pew Research Center Millennial Conference video page. If you have any questions leave them in the comments or get in contact.

Dummyimage.com Gets New Features

Ever since the surge of interest in my pet project dummyimage.com I’ve been meaning to add some new features. Today is the International Day of Awesomeness (which coincides with Chuck Norris’ birthday) and I couldn’t think of a better time to unveil DummyImage.com‘s new functionality to the public.

a 600x200 Dummy Image

Here is a run down of the changes:

Specify Custom Colors

You can choose the background and foreground colors of the dummy image right in the url using a 6,3,2, or even 1 character hexcode. Don’t worry if you forget to do this as dummy image will default to gray and black.

Add Your Own Text

A lot of people wanted to be able to add their own text to a dummy image to better communicate what it is representing. Now using the &text= parameter you can.

A Better Typeface

Arial be damned! Font geeks cringed at my basic choice of a font. Some seemed worried about my distribution of the most popular font on Earth. Now both camps can be happy as I’m now using the completely free and open M+ Font. I also changed the X in the middle of the images to a multiplication sign × as pointed out by Erinah and Dave Cortright.

Standard Image Sizes

Dummyimage.com is a useful prototyping tool and a lot of prototypes and wireframes have ad positions. Instead of memorizing dimensions you can now bring up ad sizes by their industry-standard name like largerectangle, skyscraper, and fullbanner. You can even customize the colors, text, and formats of theses sizes as well.

Pick Your Format

Before you could add any image format extension to the url but my script would still generate a GIF image everytime. Now you can generate proper PNG, JPG, and GIF images and drag them into another app trouble free.

Happy Birthday Chuck Norris

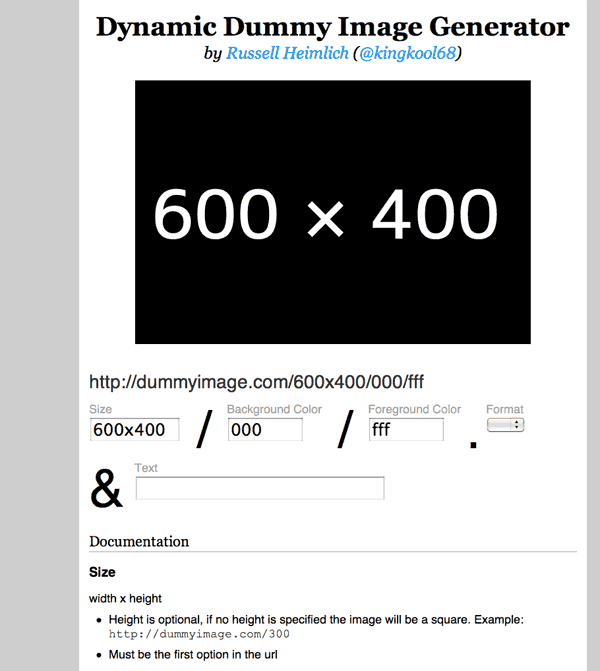
And with these new features I figured it was time to give the site a proper, though still simple, design. Rather than bury how these features work in long, boring text I made a little tool that shows you everything you need to know with minimal fuss.

Not a fan of change? Don’t worry, you can still use Dummyimage.com to generate place holder images exactly the same way you have always been doing it.

So thank you to everyone who has e-mailed me, tweeted me, left a comment on a post somewhere or otherwise provided feedback on dummyimage.com. I’m glad so many people found it as useful as I think it is. Keep the ideas and dummyimage variations coming. I’m sure this thing could be better.

Put Your Print Stylesheet At The Bottom

I woke up this morning with a profound realization. “Why not put print stylesheets at the bottom of the page so they load last?”, I thought to myself. It makes perfect sense to any performance-conscious web developer who savors every last millisecond of performance gained. Your print styles aren’t needed until you print the page, so it is okay if it takes a little while longer to download.  Unfortunately the quirkiness of the browser makers trumps our otherwise sound logic.

According to tests done by Steve Souders, web performance guru extraordinaire, Internet Explorer blocks the rendering of content until all of the stylesheets have been downloaded regardless of their media type. And since Internet Explorer is the dominant browser by visitors to most mainstream sites, there is absolutely no benefit to including the print stylesheet at the bottom of the page.

A possible workaround would be to dynamically insert the print stylesheet (using JavaScript) into the web page after it has finished loading. This just feels icky to me as the poor sap who is most likely to print out the webpage I so meticulously coded is also the poor sap using Internet Explorer 5.5 with JavaScript turned off and BonziBUDDY turned on.

Dummyimage.com Sees A Surge In Interest

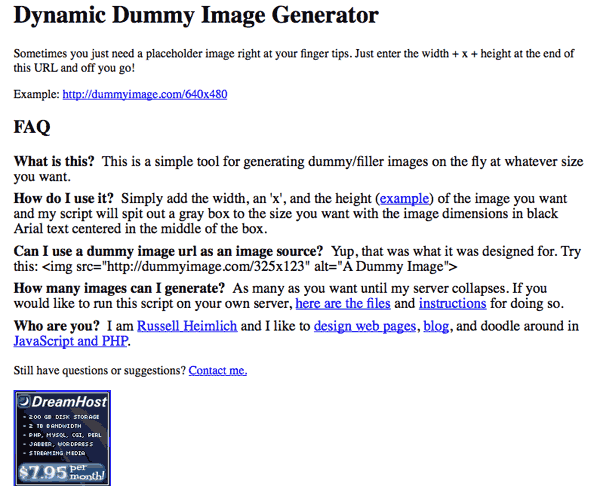
Way back in August of 2007 I built a simple PHP tool that generates place-holder images at different size by simply changing the URL. The idea came to me when I was working on a redesign for USNews.com. I hated opening up Photoshop, creating a new document,  filling the background layer, and exporting for web just to make a simple placeholder image. That is why I made dummyimage.com.

I figured it would be useful to other people which is why I also released the complete source code, documented and including instructions for setting it up on your own server. But like most new things, few gave it any notice.

The other day my friend Charlie Park (founder of Pear Budget) found it when doing some in-browser wire-framing and sent out a tweet to all of his followers. But he didn’t stop there. Charlie also posted it to Hacker News, a simple news aggregator aimed at geeks. It was obvious that my little tool was resonating with other developers with the tagline “Lorem ipsom for images.” In 24 hours, the Hacker News story got 161 votes with 77 comments, 513 people bookmarked it on del.icio.us, and 337 tweets.

What really struck me was how dummyimage.com was crossing the language barrier. I saw tweets mentioning in SpanishJapanese, Russian, German, Dutch, even Latvian. I’m glad my idea was simple enough that foreign speakers could easily pick it up without any translation help.

All of this sudden attention also produced helpful feedback and new feature ideas. I started working on an update this past December for a few additions I wanted to see but this recent surge of interest has lit a fire under my butt to continue developing. As is the nature of opensource software, people don’t have to wait for me; they can adapt the code to their own needs. Here are some iterations that have already been made:

And somewhere down the line I would like to give it an attractive homepage. Hooray for side projects!

Paying For JavaScripts? Just View Source

ThemeForest.net is an online marketplace for developers to sell themes, templates, and other web development related goodies. A lot of the files are for the backend making it next to impossible for someone to copy them without breaking into your server. But ThemeForest offers JavaScripts for sale and even offers a live preview.

By the very nature of the web, a front end technology like JavaScript requires the source code to be downloaded to your computer before it can run. This means anyone with a little know-how can easily bypass the need to buy the script and piece it together themselves.

For example, take this JavaScript calendar widget which has 0 sales as of this writing. All you have to do is go to the live preview and remove the frame by clicking the link in the top left corner. From there it’s just a matter of viewing the source (Choose View->Source in Internet Explorer, View->Page Source in Firefox) and copying the necessary JavaScript and CSS files. Here’s everything you need for this calendar widget:

Now before you get all upitty about the ethics behind this, you should know that this script is freely available from the author’s own site, which was based on an open source project from around 2006 according to comments in the CSS files.

Granted ThemeForest isn’t targeted at professional developers like me so someone might be more than happy to plunk down $8 to download everything in one nice, neat package. But if I were selling scripts on ThemeForest, with the expectation of a profit, I would be pissed that ThemeForest didn’t take more precaution to protect my source code. At the least they could obfuscate the live preview code using a tool like /packer/.

At any rate this demonstrates why it’s so hard to sell JavaScripts by themselves due to the very nature of how they work in an open web.