Posts tagged 'How To'

Making JavaScript And The Blip.tv Player Work

It sure would be nice if the blip.tv player had an easy way to change which video is playing in a playlist using their JavaScript API. But they don’t, so I had to roll my own to make the two play together nicely. Here is the end result (Note there are some line breaks I put in here for visual formatting, it might not work):

var player;
var currentPlaylistItem;
var currentState;
function getUpdate(type, arg1, arg2) {
	switch(type) {
        case "state":
			currentState = arg1;
		break;
		case "item":
			currentPlaylistItem = arg1;
			var episode = player.getCurrentItem();
			document.title = episode.title;
        break;
    }
}

var flashvars = {
	'file': 'http://blip.tv/play/ha0CjMVEh_8o',
    'enablejs': 'true',
    'javascriptid': 'blip_player',
    'autostart': 'false'
};

var params = {
	'allowscriptaccess': 'always',
	'allowfullscreen': 'true',
	'expressinstall': '/millennials/flash/expressInstall.swf'
};

var attributes = {
	'id': 'blip_player',
	'name': 'blip_player'
};
swfobject.embedSWF('http://blip.tv/play/ha0CjMVEh_8o',
'blip_player', '770', '470', '8.0', false, flashvars,
params, attributes, swfCallBack);

function swfCallBack() {
	player = document.getElementById('blip_player');
	$('#agenda h3 a, #agenda a.blip_tv').click(function(){
		var playlistItemNum =
                    $(this).attr('href').split('#')[1];
		changePlaylist(Number(playlistItemNum));
		$.scrollTo('.video .player', 800);
		return false;
	});
}

function changePlaylist(num) {
		var direction = 'prev';
		var diff = currentPlaylistItem - num;
		if (diff < 0) {
			direction = 'next';
			diff = Math.abs(diff);
		}
		for(i=0; i < diff; i++) {
			player.sendEvent(direction);
		}
		if (currentState == 0) {
			player.sendEvent('play');
		}
}

There are three requirements to getting started as outlined in the blip.tv wiki:

  1. The player must be embeded with the enablejs=true Flash variable set
  2. The player must be embeded with allowScriptAccess=always object/embed parameter set
  3. A JavaScript function must exist named getUpdate()

The first part of my script sets up three global variables that we’ll use.

  • player will reference the object/embed element by an ID. It is how we send commands to the show player.
  • currentPlaylistItem is the number of the video selected (or position) in the playlist.
  • currentState is either 2 (playing), 1 (loading), or 0 (stopped) depending on the current state of the player.

The getUpdate() function listens to the blip.tv player for changes like when the player is stopped or a video is changed in the playlist. The type argument is a string which we can send through a switch statement to determine what we need to do.

If the state of player has changed then we update our currentState variable with the value of arg1 (which will be a number between 0 and 2). If the event is an item change, we will update the currentPlaylistItem variable to reflect that. As an added bonus we get the title of the current playing video and change the title of the webpage to reflect this. This has zero SEO value and is really only a convenience to our audience.  Now that we know what is going on, lets get to the fun stuff.

Three variables (which are really Objects) are created for swfobject so we can easily embed the video player dynamically into the page. The ‘blip_player’ paramter is the ID of the player that we’ll be referencing shortly. The swfCallBack() function is called once the blip.tv player has loaded. There we set our player variable to reference the element of the blip.tv player. I used a line of jQuery to set the onClick() events of a group of links that will change the playlist when they are clicked.

In the HTML the links contain direct links to each blip.tv video and an anchor with a number after it. This number is the playlist position of the specific video. jQuery makes it a snap to extract just that number from the URL which we store in the playlistItemNum variable. The playlistItemNum variable is passed along to a function called changePlaylist() which does all of the heavy lifting.

Since the blip.tv show player doesn’t have a direct way of going to a specific video in a playlist, we have to hit the next or previous button on the player programmatically. The direction is set to ‘prev’ initially.  diff is calculated by subtracting the number passed to the function from the position of the currently playing video, currentPlaylistItem.

If diff is a negative number than we need to switch the direction variable to ‘next’ and get rid of the negative number by calling the absolute value method ( Math.abs() ). Now we simply send the player a command to go to the next or previous video as many times as we need to get to the desired video via a loop. Finally, if the player is stopped, we send the video player a command to start playing the video.

As an added nicety, we gently scroll the viewer up the page to the top of the video player so they’re not left wondering why nothing happened. The jQuery scrollTo plugin makes this a breeze to do.

There is one caveat for the changePlaylist() function to work: the playlist needs to be visible on the blip.tv show player. This is simply an option you set on the player configuration screen on blip.tv. Without it showing, we can’t get which video is playing and the whole thing falls apart.

That wraps up how to roll your own playlist changing function as well as shed some light on how you might control other things about the blip.tv show player using JavaScript. You can see this in action on the Pew Research Center Millennial Conference video page. If you have any questions leave them in the comments or get in contact.

Picasa People Tagging / Facial Detection Guide

Picasa 3.5 brings a new feature that scans your photo library looking for faces so you can tag people in your photos. This walkthrough video embedded below from Google covers the basics of people tagging. There is also this written guide.

First Impressions

The face detection technology built into Picasa 3.5 works ok. The scanning processes is slow but Google is aware of this problem. When it works, Picasa can group together common faces making tagging people a breeze. But when it doesn’t work you can get all kinds of wrong matches which are tedious to go through and correct. It’s certainly not something you can set and forget as you will need to spend some time double checking the suggested matches.

With that said there are a few tips and tricks to make the process a little easier. Most of the following info was culled from a help forum post.

Tips for better tagging

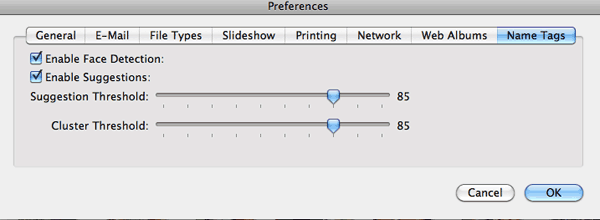
Set the suggestion and cluster threshold to 85. By default both of these values are set at 80. You can change this in the following locations:

Windows: Tools->Options->Name Tags
Mac: Picasa->Preferences->Name Tags

I found a noticeable decrease in false positives by bumping this setting up a notch, especially if your photo library is greater than about 10,000 photos.

Picasa Suggestion and Cluster Threshold

Be careful tagging blurry faced photos. When you have a bunch of blurry faces attributed to a person, the number of false positives goes way up as Picasa struggles to make a vague connection.

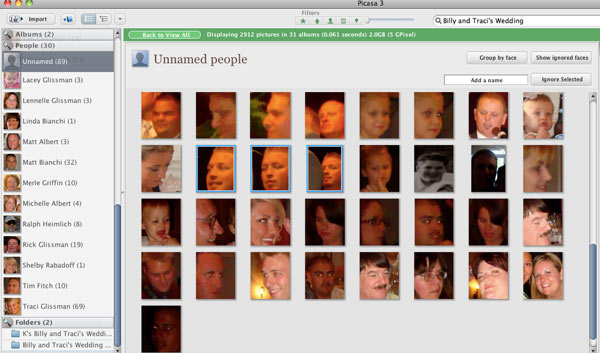
To see the unknown faces for only one folder at a time just do a search for the name of the folder and select it from the auto suggest list that drops down from the search box. Now you can easily go through the unnamed people for that folder alone cutting out the noise of unnamed people from other photos.

Picasa Filtering Unnamed People Using Search

When you’re combing through a bunch of faces, turn on the Faces filter at the top of the Picasa window. This will hide any photos that don’t have any faces in them saving you a bit of time when moving from picture to picture.

Picasa Show Only Photos with Faces button

How does Picasa’s facial recognition work?

Picasa scans the photo looking for facial patterns. When it finds a match, Picasa adds two pieces of information to a picasa.ini file (hidden by default) in the folder holding the picture. The face data is stored like this:

faces=rect64(907574589cc58a78),a30bebdb5c1a778d;

The first part, enclosed in rect64(…), is the relative coordinates for the rectangle around the face. The second set of characters after the comma is a unique identifier linking the face with a name in Picasa’s contact database which is stored in the following locations on your computer:

Windows: /Users/%USERNAME%/AppData/Local/Google/Picasa2/db3/
Mac: /Users/%USERNAME%/Library/Application Support/Google/Picasa3/db3/

(Source: Mye)

The 16 characters enclosed in rect64(…) is a 64-bit hexadecimal number which can be broken up into four 16-bit numbers used to identify the position of the rectangle used to mark the face. If you divide each of the four 16-bit numbers by the maximum unsigned 16-bit number (65535), you’ll get four numbers between 0 and 1 which give the relative coordinates for the face rectangle in the order: left, top, right, bottom.  To calculate the absolute coordinates, multiply the left and right relative coordinates by the width of the image and multiply the top and bottom relative coordinates by the height of the image.  This way the faces will always be identified even when the image is re-sized.

(Source: Oedious)

Embedding tagged people data in picture files

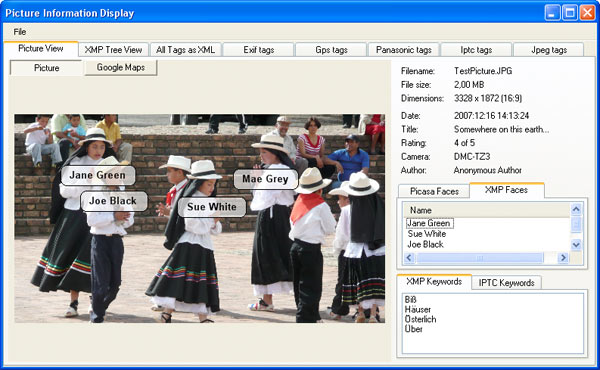
The fact that Picasa stores the tagged people data in an external data is less than ideal for some. The .NET program AvPicFaceXmpTagger reads Picasa 3.5 face definitions for a given list of pictures and writes them as XMP metadata tags inside the picture files. It can also add the person’s name as XMP keywords and/or IPTC keywords which can be read by other photo programs.

I haven’t tried it out myself but it is worth mentioning as a workaround until Google addresses this problem.

avpicfacexmptagger Main Picture Display

(Source: Andreas Vogel)

Conclusion

Overall the people tagging features introduced in Picasa 3.5 are a nice start but there is still a lot of work to be done. Hopefully the future improvements will be frequent and steady as this is an exciting new vector of information to make digging through photo collections a joy. Things will really get interesting when it will be able to talk to other photo services (like Facebook) to gather and sync and kinds of metadata.

Play DOS Games On A Mac With Boxer

Who needs fancy graphics and snazzy physics known in modern gaming? I prefer the creative, classic DOS games of yore to today’s hyper-real slaughter fests. Up until this weekend I had know idea how to play old DOS games on my Mac,and then I found Boxer.

Boxer Logo

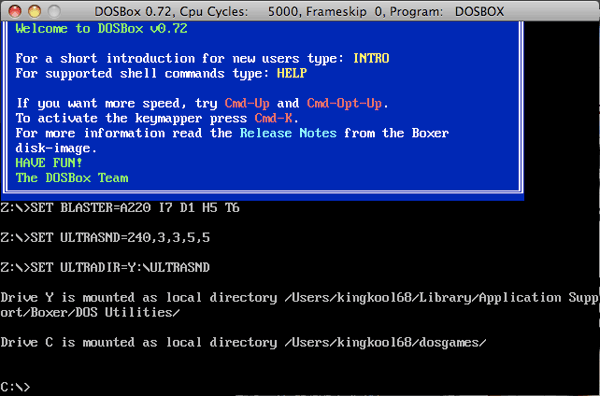
Boxer is a DOS game emulator for OS X and is based on the open source project DOSBox. It packs a few little tricks to help you load and launch your games with ease. The problem is these tricks aren’t very obvious so I’ll give you a little walkthrough.

After downloading and installing Boxer, the first time you run it it will ask you to choose a designated game folder. Which ever folder you choose will auto-mount as your C: drive every time you start Boxer. From here you can navigate to the folder with your game in it and launch the .exe file. Wait, you don’t remember how to navigate around that black screen with a white blinking cursor? Yea neither did I.

Boxer DOS Emulator Screenshot

Luckily Boxer makes it a snap to run your games straight from the Finder. Just go to the game folder and add ‘.boxer’ to the end of it’s name. Now you can double click the folder and it will automagically launch in Boxer. Some games require you to have a CD-ROM loaded but Boxer can handle that too! Just make a copy of the game folder inside the game folder and add a ‘.cdrom’ to the end of it’s name. Boxer will automatically detect it and mount it as a virtual CD for you. Can’t get much easier than that!

Game Folder Rename Example

Other niceties include Mac friendly keyboard shortcuts like cmd+F for fullscreen view and cmd + up/cmd + down to increase/decrease the CPU speed. Other ones are listed on the Boxer site.

Now you can relive the gaming classics. If you need some ideas to get started take a look at the adventure game Sam and Max: Hit the Road or the first person that took the world by storm, Doom. Try your hand at the original Warcraft or one of my favorite turn-based strategy games Heroes of Might and Magic 2. Remember those old education games from the Learning Company like Treasure Mountain? There are a ton more games up for grabs at Abandonia, which is dedicated to abandoned DOS games and Squakenet.

Even thought these games might be old, they are still just as addictive. Be sure to give yourself some time to get sucked in.

Combat Roach Gel Kills Cockroaches

Like most apartment dwellers, I get the occasional visits from roaches. After a couple of weeks of trying ineffective do-it-yourself measures like keeping things extra clean and plugging up any possible entrances, I decided to invest in a tube of roach gel.

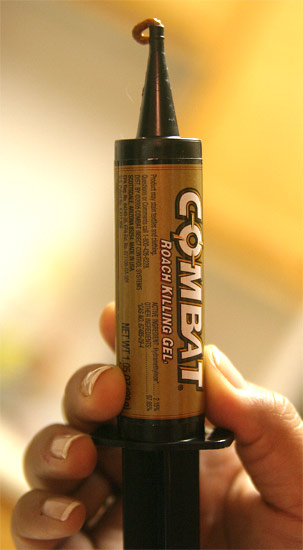
After Googling around for the best way to kill roaches, I found NoMoreCockroaches.com explaining the Combat Roach Killing Gel that comes in a syringe is the best at dealing with the pests. How does the gel work? Roaches eat the gel and then retreat back to their nest where they die and other roaches eat the poisoned carcasses, thus eliminating the nest.

Combat Roach Killing Gel

The best place to get this stuff is at Walgreens but since there are no Walgreens within a reasonable distance from my apartment, I had to order it online and wait for the mailman to bring it to my door.

I applied it to as many cracks and crevices in the kitchen before my week-long Montana vacation. Since I got back, I haven’t seen a single roach. They used to come out and scurry at night, but now they seem to be non-existent.

Roach Gel Syringe

The only cons of the gel is it is a dark brown color (which looks like poo) which can clash with your room and it can be a little messy when applying. But aside from that, this stuff is well worth the price of $5.99 per tube which should be enough for a three bedroom apartment.

So forget the sprays, powders, and traps, Combat Roach Gel is all you need.

Tips For Buying An Engagement Ring

Buying an engagement ring for your significant other can be both exciting and nerve-wrecking at the same time. Thankfully I survived the process and can now offer these tips I picked up along the way.

Note: These tips are aimed at guys from the perspective of a guy.

  1. Unless you’re the ballsy type, don’t try to pick out a ring on your own!

    I thought picking out an engagement ring would be a straightforward task. But after seeing the thousands of different minute details to pick and choose from I quickly reconsidered. Just take a gander at BlueNile.com, a good starting point for ring shopping. Can you guess which diamond type your lover would like? White gold, yellow gold, or platinum? Solitaire, side-stone, or three-stone? Four-prong, six-prong, comfort fit, knife edge, intertwined, cathedral? These things matter.

  2. Talk to your partner about the ring.

    Keep in mind this ring will be with the two of you for the rest of your lives so the recipient better be happy with it. Besides, open communication is a good trait for marriage.

  3. Set a budget before browsing

    Engagement rings are the ultimate intersection between emotion and money. You run the risk of setting yourself up for disappointment if you dive in without setting any ground rules. It is easy to raise expectations when shopping around but damn near impossible to lower them. Coming to an understanding about budget and quality between the two of you beforehand will make things sail smoothly.

    And it doesn’t make sense to go into debt before the wedding as there will be other things that require money after the two of you tie the knot (like a down payment on a house!). In other words don’t get more ring than you can afford.

  4. Talk to other family members about your plans.

    Not only does this fall under the category of the more communication the better, but you could also save a lot of money. You never know if a close relative has a diamond ring sitting in a security deposit box just collecting dust. Now you shouldn’t go around demanding old jewelry, but if your family doesn’t know that you are thinking about getting married they won’t know to offer their old gems.

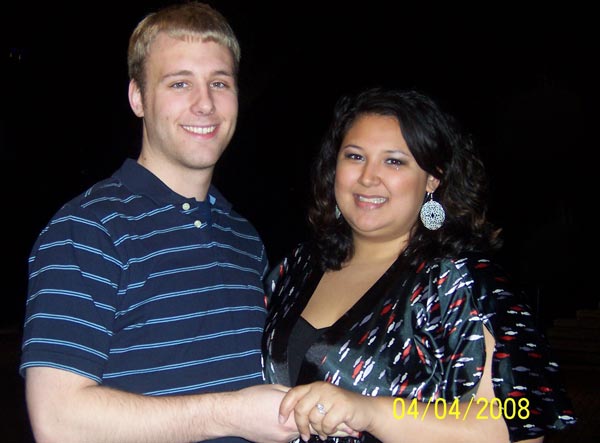
    The diamonds in Kristina’s ring were from my grandmother’s ring passed down to my mother. They were certainly better diamonds then I could afford and the sentimental value of the family history made the engagement ring unique and extra special i.e. more romantic.

  5. If possible, record the proposal on video.

    This is one of the biggest moments of your life. Capture it on video so you can show it to future generations and re-live the day in your later years. With the rise of online video, passing a video around to friends via social networks will bring you in contact with people you haven’t heard from in ages. People love seeing exactly how your proposal went down.

It all might seem daunting at first but take everything one step at a time. Try not to let the stress get to you while seeking out the perfect ring to satisfy the needs of both you. Keep your eye on the prize which should be to show your companion how much you care about them and that you want to be with them forever.

For more engagement ring shopping tips check out the guides at Mahalo.com and About.com

No Browser For Surfing? Get Some Help

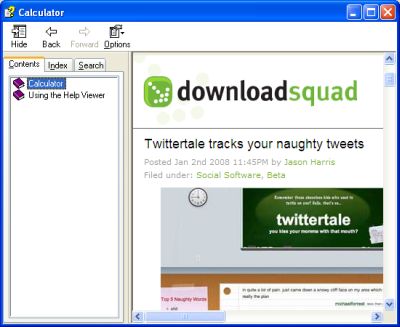
It’s hard to imagine being somewhere that locks down the web browser so much that you have to resort this nifty trick I read on DownloadSquad.com, but desperate times call for desperate measures. If you can’t reach the web through Internet Explorer due settings beyond your control and forgot your portable Firefox thumbdrive then simply open up the calculator or MS Paint and click “Help”. From there go to “Help Topics,” which will bring up a help window. Now all that is left is to right click on the title bar and select “Jump To URL.” Type in any web address you like, but make sure to include “http://” at the beginning and you should be good to go.

Browse The Web In The Help Menu

What you are basically looking at is a stripped-down, basic version of Internet Explorer which is built into Windows and used to display CHM files, or Microsoft Compiled HTML Help files. Sure there are no niceties like bookmarks or your comfy, cozy Firefox extensions, but if you need to check your e-mail or Twitter account and this is your only resort, you will put up with a little cruft in order to get your stuff. Besides there are back and forward buttons, what else do you need in a browser?

CoinCalc.com Guesstimates Spare Change

CoinCalc.com is a simple and straight forward site aiming to estimate how much moola you have stashed away in your change jar. All you need to do is weigh your jar of coins, grab a handful as a sample and enter the quantity of each coin you pulled out into the CoinCalc form. The site does a little math and guesses how much money is in the jar based on your sample.

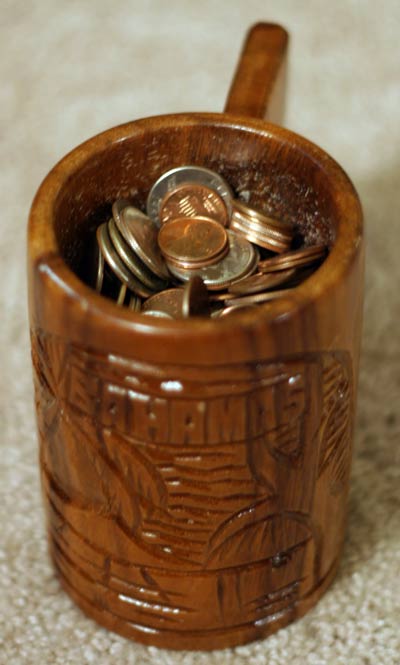
Coin Cup

I just happened to have a jar full of coins that needed to be tallied and wrapped up so I though I would give CoinCalc.com a run for it’s money (pun intended). I took 5 samples of various sizes from the same cup of coins. After counting the number of coins I would put them all back in the cup and shake them around to keep it as fair of a test as possible. I happen to have a small postal scale at hand so calculating the weight of the coins was a snap. My first weighing included the weight of the cup which came to a total of 3.375 pounds. After running all of the numbers through CoinCalc.com, I realized the weight of the cup was inflating the estimate. I weighed the empty cup and subtracted that weight from the previous weight resulting in 2.8625 pounds of pure coinage. The results are summarized in the table below:

Sample Pennies Nickels Dimes Quarters Estimated Total Estimated Total
w/o Cup
1 36 0 10 20 $43.07 $36.53
2 23 4 3 9 $33.71 $28.59
3 16 3 5 7 $36.96 $31.35
4 31 3 14 11 $37.82 $32.07
5 13 2 6 11 $46.26 $39.23

The total value of my coin-collection was $28.91 which came out to the following:

Coin Quantity Value
Pennies 211 $2.11
Nickels 33 $1.65
Dimes 59 $5.90
Quarters 77 $19.25
Total 380 $28.91

CoinCalc.com came within $10 at most of the actual value after correcting for the weight of the cup. CoinCalc’s estimation was more accurate than I thought it would be. The site gives you a good ballpark range of the value of your coins without having to dump them all over the floor and count them out one by one or paying a fee to have Coinstar count them for you.

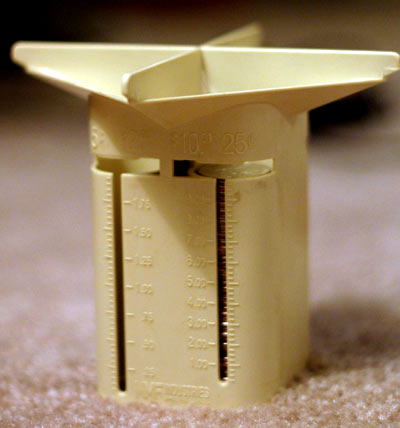
Speaking of counting, I like to wrap my own coins and I use this little device from MMF Industries pictured below to tally them up before wrapping.

Plastic Coin Counter

You simply dump your sorted coins into their respective slot and the plastic container will keep them stacked until they reach the top. At that point there is a slit where surplus coins fall out leaving you with the exact quantity for the roll. I think I got this from my parents a couple of Christmas’ ago.

(via BoingBoing)

Making A Tango-Style Icon Step By Step

Tango Icons

I have a heap of respect for the icon designers out there. These people start with a blank page and after several hours they end with a tiny graphic that communicates a heck of a lot of information. It takes a lot of talent and clever thinking to simplify an idea or concept into an understandable graphic.

Von. R. Glitschka created a step by step walk through detailing the process he uses to design an icon. The zipped download (1.8 Mb) has a set of images from each step with related notes in a separate text file. You can learn a lot about design by studying the processes of others.

More about the Tango icon library can be found at http://tango.freedesktop.org/Tango_Desktop_Project

Football Photography Tips

It is officially fall and football games can be found taking place all over the country. Action photography can be a real challenge to capture in tack-sharp clarity due to the split-second timing and cat-like reactions necessary to freeze motion. Last year I photographed my girlfriends annual Turkey Bowl intramural flag football tournament. Coming home with a full gig and a half of photos was a thrill but there were quite a few technical problems I ran into.

Footballs in field

For one, I only had one battery. The tournament goes all day from morning to night and I need all of the juice I can get. It also didn’t help that the battery was having trouble holding a charge on that cold, brisk day. I would constantly have to take the battery out and hold it in my pocket for a while before continuing to shoot. This year that problem will be solved since I bought two batteries in addition to the original battery which I keep in my bag for an absolute last resort, emergency type of shot.

My second problem was my beginner telephoto lens. Don’t get me wrong it got me some good shots, but it is a very soft lens with a slow aperture of f/5.6. No surprise I got this lens at a great price of $120. For this year’s game I upgraded to a Sigma 70-200mm f/2.8. The faster aperture will allow me to bump up the shutter speeds during the day and at night I will probably have to go with a 1600 ISO speed.

Finally, last year was the first time shooting team sports. I had no clue as to what I was doing and just went with my instincts. Recently I have been digging through resources on the Internet about shooting football which is how I ran into this great thread on DP Review.com.

How To Shoot Football 101

Get low…. Not only does this go a long way in cleaning up the background but it makes the players (the younger the better) look bigger the life.

No matter what lens you are using shoot tight. Tight action shots give the viewer a feeling of being in the game.

Canon and the NFL have teamed up to produce a video series of football shooting tips with Sports Illustrated photographer Peter Read Miller. There is also a behind the scenes clip where Peter talks about the equipment he uses as well as events leading up to the game.

The New York Institute of Photography has a lengthy write up on football tips with several visual examples to drive their points home.

If you are in need of some inspiration there is a weekly sports thread in the DP Review.com Canon SLR Lens Forum full of all kinds of football shots. This one from BryanP particularly stand out. Bryan is the same guy who posted the excellent How To Shoot Football 101 thread.

I hope with the new gear and the reading I have been doing will pay off come game day on November 17th. I still have plenty of time to get some practice shots in and read up about more techniques.

Do you have any tips for shooting football?

How To Draw Thom Yorke In 7 Minutes

Ok so it is really a time lapse crunched down to 7 minutes but you still get the gist. Looks like this photo realistic sketch of the Radiohead front man is all done in Photoshop and some of the brush work is amazing. Hopefully it will inspire some of the artists who follow my blog.

See more speed paintings at Nexx’s YouTube profile.